Article
18 min
read
Connecting FreeSWITCH to SignalWire CLOUD
Use mod_signalwire to take advantage of SignalWire's disruptive pricing on cloud telecom services

Dani Plicka
Content Marketing Manager


mod_signalwire connects a FreeSWITCH instance to the SignalWire cloud so you can use SignalWire’s elastic carrier services with your existing dialplan. This guide explains how to retrieve the mod_signalwire connection token from a FreeSWITCH install, create a FreeSWITCH integration inside your SignalWire Space, and validate the setup by routing an inbound call to a simple FreeSWITCH dialplan that reads back the current date and time.
How to Connect FreeSWITCH to SignalWire
FreeSWITCH and SignalWire have revolutionized the way we communicate over the internet. Together, these two platforms are a powerful combination that enable developers to build and deploy innovative communication applications with ease.
It couldn’t be easier to connect FreeSWITCH to the SignalWire cloud. SignalWire was not only built by the same group of developers who made FreeSWITCH - it’s built on top of FreeSWITCH and is capable of extending and scaling FreeSWITCH use cases. Mod_signalwire allows developers to use the two together, so that you can take advantage of SignalWire’s elastic cloud infrastructure for carrier services in conjunction with FreeSWITCH in just a few simple steps.
In this post, we’ll go over how to connect FreeSWITCH to SignalWire cloud by taking the connection token from a fresh install of FreeSWITCH and placing it into SignalWire's integration interface. We'll then do some minor configuration and edit our dialplan to test out the setup.
To make mod_signalwire work, you will need a functional FreeSWITCH installation and a SignalWire Space with at least one purchased phone number.
Step 1 - Retrieving the connection token
From a fresh install of FreeSWITCH, one of the very first outputs in FS_cli is the mod_signalwire connection token, so if you catch that line, be sure to copy it down. That line looks like this:
If you missed it, a simple command allows you to display your connection token at any time from FS_cli: signalwire token
Now that you have your connection token, you're ready to complete the integration of your FreeSWITCH installation and your SignalWire Space.
Step 2 - Configuring SignalWire
Take your connection token to your SignalWire Space. Make sure you are in the project that you wish to use with FreeSWITCH and navigate to the Integrations tab. Create a new integration by selecting the FreeSWITCH option.
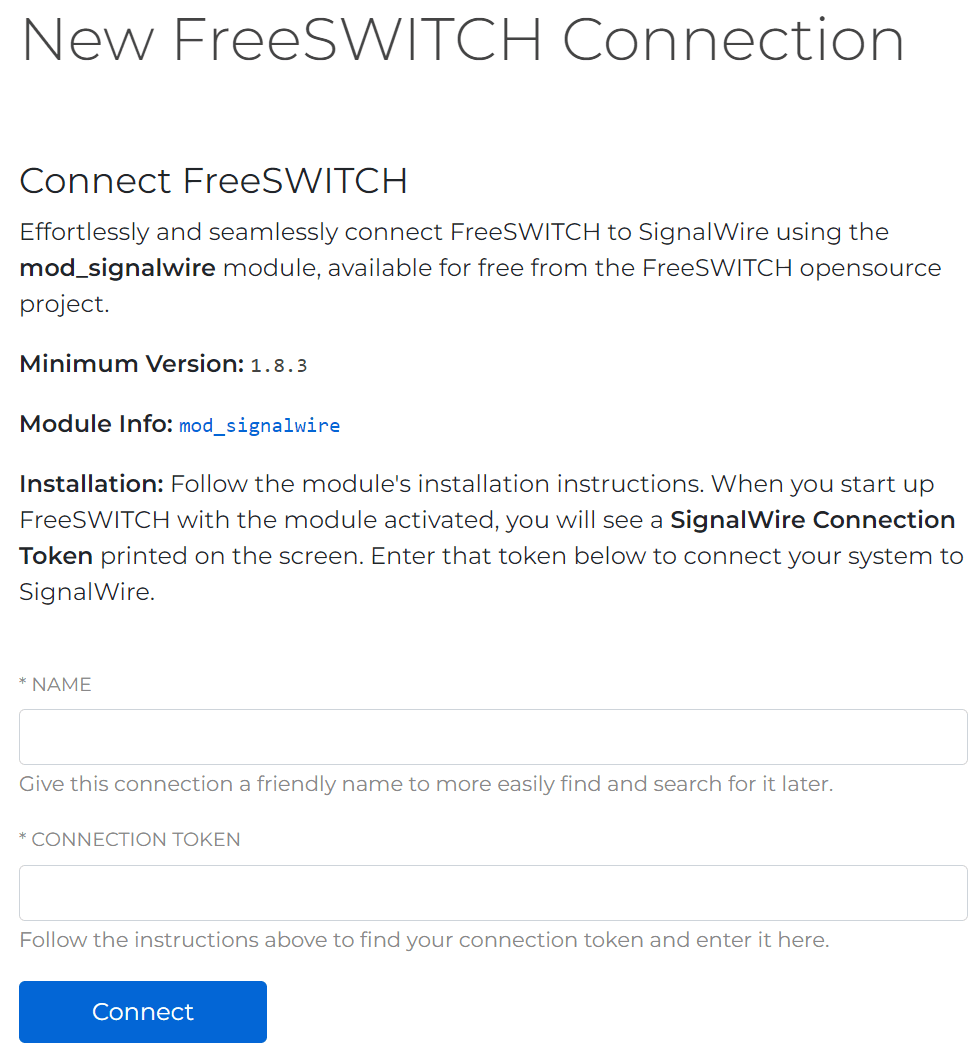
Once on this page, paste your connection token into the appropriate field and give your new connection an easily identifiable name. This will be important when connecting multiple instances of FreeSWITCH to your SignalWire project.
Step 3 - Dialplan
Here's where we'll test our setup with a simple XML dialplan. Add the following code to your /etc/freeswitch/dialplan/default.xml file (or equivalent on a non-Debian based OS):
Now call your SignalWire phone number from any other line. If everything is set up properly, you should hear the current date and time, straight from your FreeSWITCH instance!
Need additional help with FreeSWITCH or have questions about SignalWire? Come and talk to us on our community Discord!
Frequently Asked Questions
What is mod_signalwire for FreeSWITCH?
mod_signalwire is a FreeSWITCH module that enables FreeSWITCH to connect to the SignalWire cloud so a FreeSWITCH deployment can use SignalWire carrier services through a simple integration workflow.
What is the mod_signalwire connection token?
The connection token is an identifier generated by a FreeSWITCH installation that you paste into your SignalWire Space to link that FreeSWITCH instance to a SignalWire project.
What do you need before connecting FreeSWITCH to SignalWire?
You need a working FreeSWITCH installation, a SignalWire Space, and at least one purchased SignalWire phone number.
How do you connect a FreeSWITCH instance to a SignalWire Space?
Copy the connection token from FreeSWITCH, then in your SignalWire Space go to the Integrations tab, create a new FreeSWITCH integration, paste the token, and save it with a recognizable name for that instance.
Related Resources